Agencies
Agency management in Tourwriter lets you keep track of unique agency business relationships. Agencies may refer to an overseas travel agent, a retail or home-based travel agency, or any other business partner that you may sell to.
The Agency management functionality allows you to set up a B2B functionality, create detailed agency records, agent records, link agents to agencies and more.
Enabling Agency management
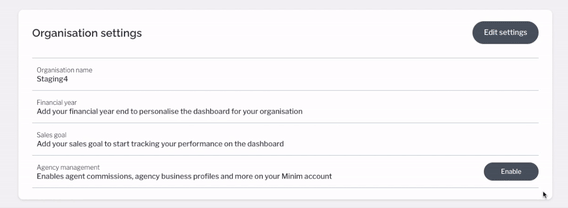
Agency management is disabled by default. Doing so limits the use of the agency management functionality to only organisations that work with agencies and perform business to business sales. To enable agency management for your organisation:
- Select the settings cog in the navigation bar.
- Switch to the Settings subtab.
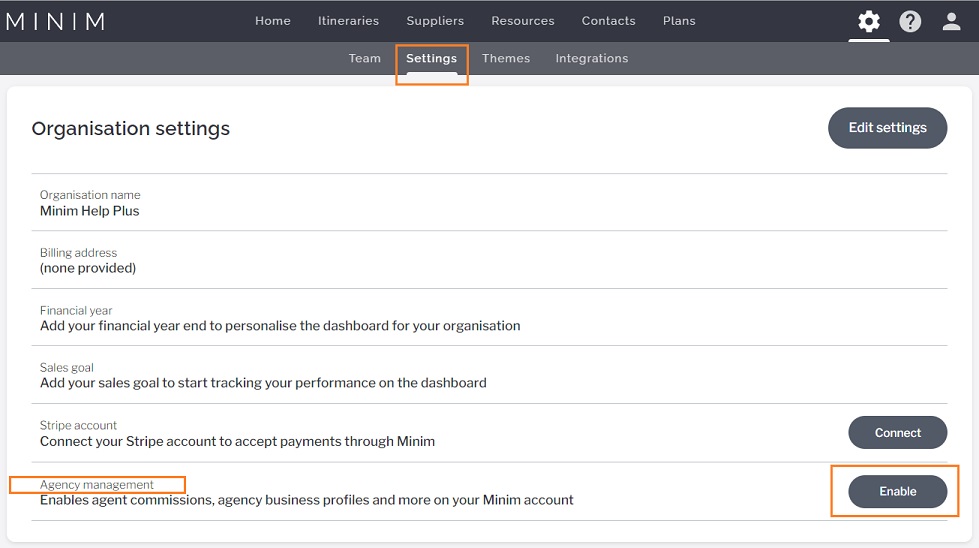
- In the Organisation settings section, enable Agency management, as shown. This enables the Agencies tab in the navigation bar.
Note: Once you enable agency management in Tourwriter, it cannot be undone. If you are unsure if this feature is for you and wish to try it out, we recommend enabling it in your studio organisation.
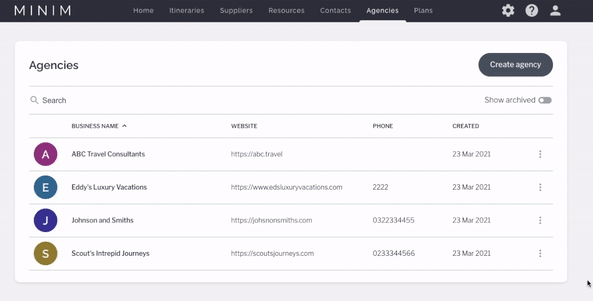
Creating an agency
The Agencies section is where you create a new agency. Here, you record the agency’s details and associate relevant agent contacts. To create a new agency:
- Navigate to the Agencies tab on the navigation bar.
- Select Create agency from the top-right corner.
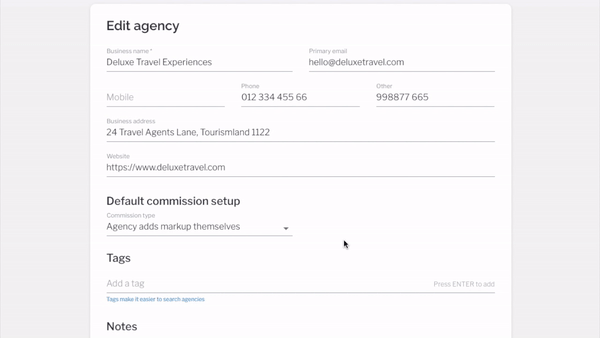
- Enter the agency details in the general info section. The fields are Business name, primary email, website, mobile, phone, and address.
- Select one of four commission setup options in the Default commission setup dropdown.
Note: To go through the calculations of each of the agency commission setup options, see Commission settings explained.
- Add a generic tag to the agency record to associate it with terms that you repeatedly use. You can associate an unlimited number of “tags” with a contact record in the Tags section.
- Include any relevant notes about the agency in the Notes section.
Note: All the fields in the general info section restrict entry to 255 characters.
Adding an agent to an agency
By adding an agent contact to an agency, you can list them as the agency’s primary contact. To add an agent to an agency:
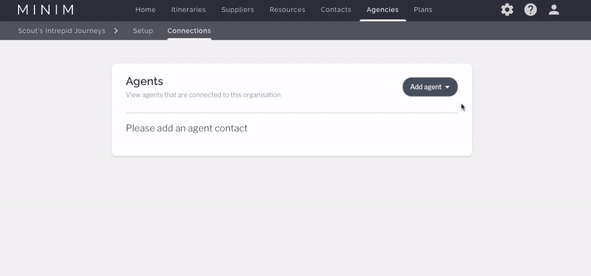
- After entering the agency information, switch to the Connections subtab.
- Click the Add agent dropdown button and choose one of the two options; Add existing contact, Create new.
Add an existing contact
The Add existing contact option lets you add an agent contact from the contacts library to the agency.
- Search an existing library contact by entering the first name or last name.
- Begin typing the name of your contact and select the desired record when it appears.
Note: If the search generates no results, either the name you have searched does not currently exist in your contact library, or the agent contact is added to another agency.
- Select Add agent to add them to the agency.
Create a new agent contact
In addition to creating an agent contact through the contacts library, you can also create a new agent contact from within the agency.
- Click the Add agent dropdown and select Create new.
- Enter the First name, Last name and Email of the agent contact record you wish to create.
- Select Add agent to add them to the agency. The contact is auto-saved to the contacts library during this process.
Note: An agent contact can only be associated with one agency. This is based on the assumption that an agent associated with two agencies would have separate emails for each company. You would then need to add them as two contacts to each agency.
Viewing agency profile
You may view or edit an agency profile at any time. To edit the Agency details:
- Navigate to the Agencies tab in the navigation bar
- Select the agency you wish to edit. Doing so opens the Edit agency page.
- Make the required changes and select Save.
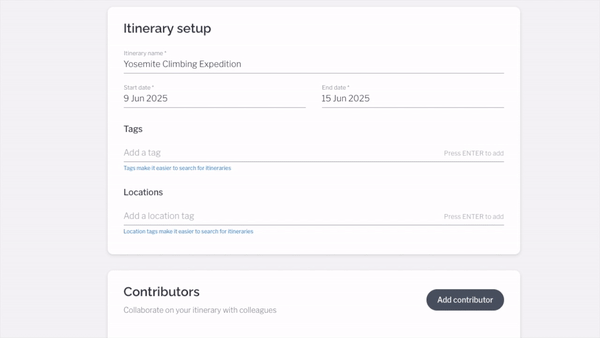
Adding an agency to an itinerary
Adding an agency to an itinerary allows you to associate the agency’s profile with the itinerary. This includes the agency commission type setup, agency margin or commission percentage, if any, and more. The itinerary displays the agency pricing that’s determined by the agency’s commission type option at the time that the agency was added to an itinerary. To add an agency to an itinerary:
- On the Setup tab of the itinerary, scroll to the Agency section and select Add agency. This opens a search window.
- Search for an agency or an agent contact. The search generates a list of agencies and associated agent contacts that you have added to your organisation. See Creating an agency.
- Select the agency and the agent contact. Linking an agency to your itinerary requires you to choose an agent contact associated with that agency.
- Note: If more than one agent is associated with the agency, the search lists all the contacts.
- If no contact is associated with an agency, only the agency name will appear.
- On adding the agent contact, the Agency section displays the agency name followed by the agent contact, as shown below.
- You may click the contact book icon to edit the agency or the agent contact.
- To remove an agency from the itinerary, click the delete button.
Rules to add agency to itinerary
Here are some important rules to remember when adding an agency to an itinerary:
- You can only link a single agency to an itinerary.
- Only one agent contact from an agency can be linked to the itinerary. The reason being, you will be assigned a main contact for this particular itinerary within the agency.
- Deleting the agency from the itinerary automatically deselects the agent contact and removes agency pricings.
- To go over the general rules while calculating agency pricing against the agency commission type, refer to More information in the Commissions settings explained article.
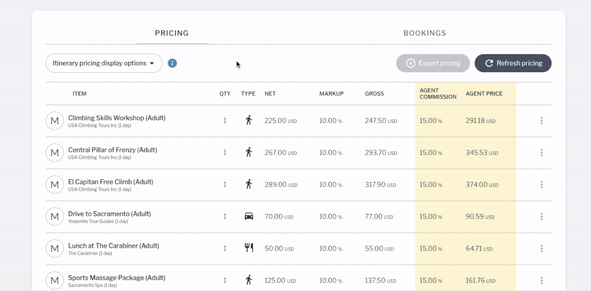
- To re-establish whether the commission setting chosen for the agency has carried through to the itinerary, head to the Pricing section of the itinerary and click the blue warning button, as shown below:
- When duplicating an itinerary that has an agency added to it, the agency will not be copied and will need to be re-added.
Archiving and restoring an agency
The archive and restore function lets you archive an agency to move it out of the agencies library and restore the archived agency at any point in time.
Archiving an agency
To archive an agency:
- Select the options menu (three dots) at the end of an agency row in the agencies library.
- Choose Archive from the dropdown list.

Note: Archiving an agency removes it from the library. Restoring it will reinstate them in the agencies library.
- Enable the Show archived toggle to access the archived agencies view.
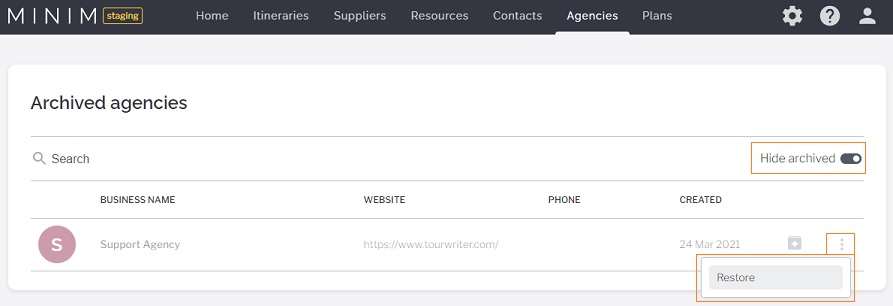
Restoring an agency
Restore archived agencies in the archived agencies view. To restore an archived agency:
- Toggle Show archived in the agencies library to access the archived agencies.
- Click the options menu (three dots) at the end of the agency row and choose Restore from the dropdown list. The agency will be available in the agency library again.
 Previous Post
 Next Post


